Showing posts with label Outdoor Science. Show all posts

Monday, January 10, 2011

Science Adventures...

Wolf Lodge Bay on Coeur d'Alene lake is a wintering location for migrating bald eagles. The Science Mommy recently took her Kid Scientists on a science adventure...

It was around 5 degrees the afternoon we headed out to Higgin's Point to see the Eagles.  We all bundled up and stayed as long as we could!
 
Aiden enjoyed spotting the eagles with his binoculars so that he could see them up close.

Higgin's Point is a good spot for bird watching in the summer too, so there are mounted telescopes and interpretive signs.  

Their information about eagles is interesting and easy to read, for most Kid Scientists.

We caught this eagle fishing...thought the light was fading, we could see the fish caught in talons as the bird flew off.

The eagles are magnificent and it was well worth the trip to watch them.


Saturday, August 21, 2010

Nature Walks...

A reader recently asked about journals for Nature Walks.  I put together this Nature Journal for her girls to use on their walks.

Ages: Kids should be able to write or draw their observations without frustration.  Otherwise, just enjoy your walk without journaling.

Materials: Consider binoculars, hand lenses or cameras.  All these tools help Kid Scientists focus their observations on something specific and will give them more to write or draw.

Procedure:  Nature Walks can be as simple as a walk through your neighborhood or as involved as a day trip to a new location.  Having a specific focus for Kid Scientists will enhance what they are observing on their walk.
  • Look for as many different trees as you can find.  Gather fallen leaves as evidence of their difference or make rubbings of different types of bark.
  • Look for as many different wild flowers as you can find.  This is a good one for digital cameras so that walkers who come along after you can also enjoy the flowers.
  • How many different animal signs can you find?  This would include nests, feathers, tracks, scat etc.
  • How many different noises do you hear?  Can you tell which ones are natural and which ones are man-made?
  • What can you see that is living?  What is not living? Why are both important?
  • Check out this post for more nature walk ideas
Make sure you have a sense of what they will see and hear before you set their specific focus.

The Nature Journal can be printed out, folded and turned into a book that Kid Scientists add to over several different excursions.  I like using the Notice / Wonder format because it encourages your Kid Scientist to discover what they think is important and to think about what they are seeing or hearing.  The Wonders  can also lead to future nature walks or research at home. 

How do your Kid Scientists explore Nature?

Wednesday, August 11, 2010

Exploring Tide Pools...

One of the best ways to make science real for all Kid Scientists, is to find it wherever you are.  You don't have to be able to identify all the organisms you see, just encourage the curiosity of your Kid Scientist as he explores.  Ask him questions about what he is looking at and get in there for a look also.
The boys spent about an hour looking at the tide pools.  I made sure to set a couple of guidelines for keeping the animals they saw safe...
  • Don't chase animals around the pool
  • Nudge shells gently...if something is living inside (it's firmly attached) leave it alone
  • If you pick anything up, ask for help to make sure you handle it gently
  • Watch where you're walking so that you don't step on any animals or slip and fall
Kyle and Connar saw a huge crab scurrying around on the side of the rocks.  We admired it's camouflage, in fact I wasn't even able to get a good photo.
 Aiden found several Hermit Crabs and giggled as they ran over his hands.  We were very careful to hold them close to the water we found them in and not to drop them.
Since we were in Maui, we spent lots of time looking at the volcanic rock and speculating about how the lava flows would have looked.

What science have you found...on vacation or in your own backyard?

Tuesday, June 15, 2010

Neighborhood Nature Walk…

This is a repost of some fun ways to interest your Kid Scientists in observing the world around them...
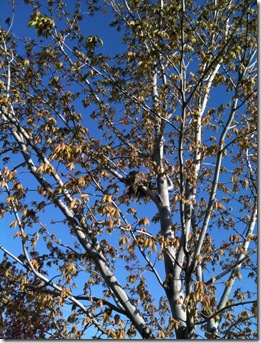
photo
Can you see the nest in the tree?  Tucked into the fork of a branch right in the middle? I couldn’t see baby birds, but as I stood under the tree, I could hear them chirping.  There is a great diversity of living things right in our neighborhoods for Kid Scientists to discover.  Here are some ways to encourage Kid Scientist observations…
Digital Nature Walk – Hand your camera to your Kid Scientist during your walk.  Challenge her to look for evidence of animals as well as the animals themselves.  She might find a train of ants, a nest, tracks in the mud or lady bugs in the garden.  Your Kid Scientist can collect her observations with pictures.  If she’s really adventurous, she could create a Field Guide for your neighborhood.
Nature Walk Scavenger Hunt – For those Kid Scientists who need help slowing down and observing write a Scavenger hunt list on an index card to take on your walk (if your Kid Scientist can’t read you can read the list to him or enlist an older sibling to be his partner).  Include things you know he’ll find easily as well as a couple real challenges…a robin, a wild flower, a spider web, a nest, animals tracks, ducks…
ABC Nature Walk – As you’re walking find things that begin with each letter in the alphabet…ants, bumble bee, columbine, daisy…this is way for your Kid Scientist to learn more specific names for things as well.  If following the alphabet is too much of a challenge, you can turn it into ABC / I Spy, “I see something that starts with L”  “Lady bug”
Nature Walk 1 2 3 – As you walk, ask your Kid Scientist to count what they’re seeing.  “How many birds will you see before we get to the corner?”  “How many daisies are on this plant?”  “How many dragonflies do you see?”
Amazing Things – Tell your Kid Scientists that at the end of your walk everyone will get to share an Amazing Thing they saw while walking home.  Giving your Kid Scientist a chance to walk with wonder, looking at everything, encourages creativity and close observation.  Once you’re home, it’s interesting to hear what they thought was amazing.
Sounds of Nature – Have your Kid Scientists sit or lay down with their eyes closed for one minute – just listening.  At the end of the minute, ask them to share what they heard.  If bird sounds are clear, ask Kid Scientists if they can figure out how many birds are making the sounds.
The Science Mommy would love to hear about your Neighborhood Nature Walk

Thursday, June 3, 2010

Adventures in Nature!

A group of students from my school visited Turnbull National Wildlife Refuge and The Science Mommy was asked to chaperone (in her official “Science Teacher” capacity!)  This is my all-time favorite field trip, so I took my Science Kid, Aiden along with me for the day. 

Turnbull is a Wildlife Refuge, and the staff do a fantastic job of teaching kids about habitat, diversity, and the need for wildlife protection.  This unique habitat is home to many species of migratory birds, especially water fowl.  The kids participated in three different activities while we were there.

Science 023It was rainy and a bit cold, but we were able to see lots of birds and evidence of other wildlife on our hike.  Our guide pointed out cinnamon teals, mallards, kildeer, barn swallows and red-winged black-birds to name just a few.  We looked at trees felled by beavers, and examined trees eaten by porcupines as well as understanding why snags are important for habitat.

Science 024  Science 026

In the pond study, Kid Scientists collected samples from two different regions – the water column and the muddy bottom – and examined the invertebrate life to determine water quality.  Aiden found a midge larvae, several scuds, and a large predaceous diving beetle.  Using field microscopes and hand lenses kids discovered, identified and documented the life from the pond.  Aiden also found a frog near the pond.

Science 027Turnbull also has a classroom with mounts of animals that would be commonly found at the refuge.  Here Kid Scientists can get up close to animals and examine adaptations that help the animals survive and thrive in the wild.  Aiden was most interested to learn that while owls have extremely large eyes (compared to the size of their skull) they are not able to move their eyes independently, an important reason for their ability to turn their heads 270 degrees!  Here he is at the touch table with a squirrel.

The trip was great - for the middle school Kid Scientists  and for Aiden and I.  If you live near Cheney, WA, Turnbull is open to the public and is easily accessed for day trips.  Follow the link above for more information.  This is not the only place where kids can get close to nature…check out other places in your area and take your Kid Scientists on a new adventure!

The Science Mommy would love to hear about your trip into the wild!

Tuesday, May 25, 2010

Can you build a Bubble Blower?

This is a great investigation to pair up with Bubble Solutions.

Ages:  All ages can participate in this investigation

Materials: A box of stuff...straws, string, small paper cups, empty thread spools, random toys...

Procedure: 
  • This procedure is really experimental play.  Kids use the components available to discover what tool will create the best bubble
  • This is a great opportunity for parents to explore and play with their kids
  • Clean up...this is a big soapy mess.  Using a bit of vinegar in a spray bottle of water will help clean up soap residue from tables, chairs and other places you don't want it!

Tell Me: The Science Mommy would love to see pictures of your bubble blowing adventures!

Can you create a Bubble Solution?

Is there anything better in the summer than bubbles?  This can keep your kids going all afternoon!

Ages: This investigation is better for the Big Kids.  Little Kids will enjoy playing with the product though.

Materials:  Small plastic cups, water, several different dish soaps, glycerin, straws or bubble wands

Procedure:
The basic components of a bubble blowing solution are water, soap and a couple drops of glycerin.  Kid Scientists will explore ratios of those components and create their best bubble solution.
  • Kid Scientists will use all the materials they are given!  Especially if they are engaged in a fun investigation.  Set materials up for kids in small containers, giving them only the amounts you want used.
  • Each Kid Scientist will need a copy of the data table to record their investigation
  • When a solution is created, kids can blow bubbles to check how well it works

Sunday, May 23, 2010

Micro-Ecosystems

Ecology is the study of how living and non-living things interact in an ecosystem.  An ecosystem can be a tropical rainforest, it can be the abandoned corner lot or it can be the micro-ecosystem in your backyard.

Materials: 1-yard of string or yarn, knotted in a circle for each Kid Scientist

Procedure:
  • Invite your friends, cousins or brothers & sisters to join you
  • Drop the circle of string somewhere in the yard
  • Lay on your tummy near the micro-ecosystem
  • Observe what is happening in this tiny system...think about what is living and what is not living
  • Stay still for a while, so the creatures in your system move around
  • Compare what you saw with your friends...what is different?  What is the same?
Extensions:
- Big Kid scientists may want to list the living and non-living parts of their micro-ecosystem in their science journal
- Encourage kid scientists to visit their micro-ecosystems several different times to see what changes

For Mom's Eyes Only...
Kid Scientists often have trouble identifying non-living components of an ecosystem.  As they learn more about the world around them, Big Kids may easily identify air or sunlight as non-living.  Little Kids aren't so sure, they don't have a clear "rule" about what is living.  Many Little Kids think that water is living because it moves (they could say the same for wind).  Many kids will have a hard time with things like seeds or leaves off of trees.  Engage your kids in conversation, ask questions and see why they think, what they think. 

Friday, May 14, 2010

How is an Oil Spill cleaned up?

With the recent oil spill in the Gulf, Big Kid Scientists may be interested in understanding clean-up methods.  This exploration is adapted from "Oil Spill!" found in Picture Perfect Science Lessons by Karen Rohrich Asnberry and Emily Morgan.


Ages: Big Kid Scientists

Science Book Connection: Oil Spill! by Melvin Burger

Materials to Set up the Exploration:  Mom Scientists first need to prepare the oil for this exploration by mixing 1 tsp of powdered black tempera paint and 4 cups of vegetable oil.  Simulated oil is being used because black oil would be harmful to kid scientists.

  • Newspaper to cover work surface
  • 3 disposable pie plates
  • 3 rocks
  • 3 leafy carrot tops, celery tops, or weeds
  • Pipe cleaner
Procedure to Set up the Exploration:
  • Cover your work area with newspaper
  • Set up the oil spill models
    • Put a rock in each pie plate to represent the shore line
    • Put a leafy plant in each pie plate to represent aquatic plants
    • Model animals out of the pipe cleaners to represent aquatic animals, place one in each pie plate
  • Fill each pie plate about half full of water
  • Add 1/8 cup of simulated oil to each pan
Materials for the Exploration: plastic cups, plastic spoons & forks, yarn, nylon stocking, cotton balls, coffee filter, sand, paper towel...other materials that may aid in oil clean up

Procedure for the Exploration:
  • Your job is to find out which material will remove the most oil from the oil spill model
  • Select a material to test in each oil spill model
  • Determine a strategy for comparing removed oil from each system
  • Attempt to remove oil from each system
  • What was the effect of the oil spill on the model environment?
  • Which material was best for cleaning up the oil spill?  What is your evidence?

Wednesday, May 12, 2010

What affects Seed Germination?

Many families are busy getting vegetable gardens started or planting flowers.  Kid Scientists can explore germination with a few left over seeds.

Ages: This exploration will be interesting to all ages of Kid Scientists.  Read on for extensions for the Big Kids.  

Materials: Seeds, paper towel, water, plastic bags, plastic cups, garden soil

Procedure for Little Kids: 
  • Choose a question to test
    • Can seeds germinate (sprout) if they aren't in dirt? (set seeds in damp paper towel or in a plastic cup with a bit of water...try both!)
    • Will one type of seed germinate faster than another? (use two or more different types of seeds, they can be planted in cups of soil, or tucked into a baggie with a damp papertowel)
    • Will seeds germinate faster if they are in dirt? (try seeds planted in a cup of soil and seeds in a damp paper towel...make sure you use the same type of seed)
    • Can seeds germinate in the refrigerator? (put seeds in damp papertowel in both the fridge and on the counter, compare germination)
    • Can seeds germinate in a dark place? (use a similar set-up to the refrigerator)
    • Will seeds germinate faster outside or inside? (use a similar set-up to the refrigerator)
  • With help, Little Kids can set up their seed experiment.
  • Make observations every day
  • Ask Little Kids to describe what they saw and what they learned.
Procedure for Big Kids:
  • Encourage Big Kids to come up with their own questions to test...if they're stumped they could choose from the list
  • With a question, Big Kids should decide how to set up their investigation.  Help them with their variables, making sure they have a control and only one manipulated variable.
  • Big Kids could also figure out a way to collect data.  What observations will they make?  How will they record their observations?
  • Ask Big Kids to describe what they saw and what they learned
The Science Mommy would love to see pictures of your investigations!

Saturday, April 17, 2010

Side Walk Paint

Sidewalk paint allows kids to create an amazing design that washes away with the next rainfall!


Ages:  3+

Materials: For each cup of paint you'll need -
  • clear plastic cup
  • 1/4 c cornstarch
  • 1/4 c cold water
  • food color
  • large, child friendly paintbrush or foam brush
Procedure:
  • Depending on the age of child making the paint, pre-measure or encourage children to measure, water and corn starch and combine in a clear plastic cup.  This is best done outside because the cornstarch will be messy!
  • Mix the water and cornstarch thoroughly.  If your paint is too thick, thin it with a bit more water.
  • Kids can add drops of food color to tint their paint.  With very small children allow them to choose the single color, and add it for them (food color will permanently color fingers and clothes)  Older children can follow the formulas on the food coloring box to make a variety of paints. 
  • Turn this into an experiment by throwing away the food coloring box and challenging your kids to make as many different colors as possible.  They can record their combinations and try to replicate each others colors.

Choose a sunny day and relax while kids explore mixing colors and painting all over the driveway.  Cornstarch is non-toxic and easily cleans up with water.