This is a repost of some fun ways to interest your Kid Scientists in observing the world around them...
Can you see the nest in the tree? Tucked into the fork of a branch right in the middle? I couldn’t see baby birds, but as I stood under the tree, I could hear them chirping. There is a great diversity of living things right in our neighborhoods for Kid Scientists to discover. Here are some ways to encourage Kid Scientist observations…
Digital Nature Walk – Hand your camera to your Kid Scientist during your walk. Challenge her to look for evidence of animals as well as the animals themselves. She might find a train of ants, a nest, tracks in the mud or lady bugs in the garden. Your Kid Scientist can collect her observations with pictures. If she’s really adventurous, she could create a Field Guide for your neighborhood.
Nature Walk Scavenger Hunt – For those Kid Scientists who need help slowing down and observing write a Scavenger hunt list on an index card to take on your walk (if your Kid Scientist can’t read you can read the list to him or enlist an older sibling to be his partner). Include things you know he’ll find easily as well as a couple real challenges…a robin, a wild flower, a spider web, a nest, animals tracks, ducks…
ABC Nature Walk – As you’re walking find things that begin with each letter in the alphabet…ants, bumble bee, columbine, daisy…this is way for your Kid Scientist to learn more specific names for things as well. If following the alphabet is too much of a challenge, you can turn it into ABC / I Spy, “I see something that starts with L” “Lady bug”
Nature Walk 1 2 3 – As you walk, ask your Kid Scientist to count what they’re seeing. “How many birds will you see before we get to the corner?” “How many daisies are on this plant?” “How many dragonflies do you see?”
Amazing Things – Tell your Kid Scientists that at the end of your walk everyone will get to share an Amazing Thing they saw while walking home. Giving your Kid Scientist a chance to walk with wonder, looking at everything, encourages creativity and close observation. Once you’re home, it’s interesting to hear what they thought was amazing.
Sounds of Nature – Have your Kid Scientists sit or lay down with their eyes closed for one minute – just listening. At the end of the minute, ask them to share what they heard. If bird sounds are clear, ask Kid Scientists if they can figure out how many birds are making the sounds.
The Science Mommy would love to hear about your Neighborhood Nature Walk
Monday, June 27, 2011
Wednesday, June 15, 2011
Shaving Cream Marbling...
This project has already been posted, but we had a great time putting together this package of cards. My Little Kid Scientist Aiden asked if he could share them on The Science Mommy...
Ages: This is best for older Kids. It's a pretty messy project and requires a bit of dexterity. With supervision & assistance though there's no reason to eliminate the Little Kids.
Materials: food color, toothpicks, shaving cream, paper plates, plastic knives or popsicle sticks, napkins, cards or any cardstock (gift tags & bookmarks would work well too)
Procedure:
Start by filling a paper plate with shaving cream. Choose the basic, least expensive type of shaving cream you can find. Use a plastic knife or popsicle stick to smooth the shaving cream into a relatively flat surface.
Add a few drops of food color to the shaving cream. Here's a great spot to have a chat with your Kid Scientist about mixing colors..."What colors will I have when I mix blue and green? Let's find out..."
Drag a toothpick through the colors & shaving cream to create any type of marbled pattern.
Lay your card or other paper onto the marbled pattern. Make sure you press the card into the shaving cream so that all the color is transferred to the paper.
Here's the messy part...pull the card off the shaving cream. Using the knife or popsicle stick scrape the excess shaving cream off the card. You can then use a paper towel or napkin to wipe the remaining shaving cream off the paper. Clean as much off as possible. The soap in the shaving cream adheres the food color to the card...you'll scrape of shaving cream, leaving the marbled pattern behind.
Shaving cream can be reused several times. In this example Aiden blended the blue & green leftovers he had scraped off a card, then he added yellow drops on top.
Leave the cards out to completely dry before packaging.
This is a messy science project! However, shaving cream is essentially soap so the clean up happens fast!
The end result is a unique collection of handmade cards!
The Science Mommy would love to see pictures of your marbled cards!
Tuesday, June 7, 2011
Road Trip Science...
Driving home from a fun weekend vacation, the Science Kids were getting very squirmy in the backseat. My solution...a quick hike and exploration of roadside geology!
Ages: All ages of Kid Scientists
Materials: The beauty of roadside geology is that you don't really need any materials. If you're not sure what geology you're seeing, there is a great series of books called Roadside Geology and they are specific to your state. The books list major roadways and detail the geologic formations visible from the road.
Procedure:
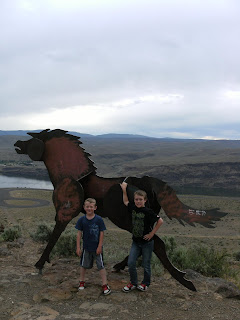
* We stopped at a viewpoint with a huge public art installation called Grandfather Cuts Loose the Ponies
* There is a parking lot at the view point, but the kids were squirmy, so we decided to hike to the top * It was a great hike, but the roadside geology lesson started on the way back down the hill...
* The Columbia river gorge is full of columnar basalt and the trail we were hiking on was also covered with basalt. The boys made observations on the difference kinds of rock and we observed the layers evident in the basalt columns on the hillside. Vesicular basalt looks like it's full of pockets or like swiss-cheese. This is because as an igneous rock (formed from lava) it cooled more quickly, trapping air in the lava. The basalt with a smoother texture cooled more slowly, without trapping air.
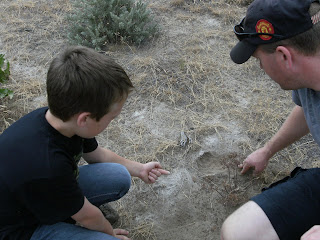
* Connar noticed some gray patches in the soil along the path. The Gorge was also covered with ash following the eruption of Mt St Helens in 1980. It's still quite easy to find deposits of ash, which is exactly what Connar noticed.
A quick hike, a little exercise for their brains too, and we were back on the road...with new rock samples for our kitchen collection.
Where can you stop with your kids for a roadside geology exploration?
Subscribe to:
Posts (Atom)


